As you prepare to give your deck a fresh new look, remember that proper preparation is key to achieving a beautiful, durable finish. Start by clearing the deck of debris, planters, and furniture to get a clean slate. But don’t stop there – inspect the wood for any damage or rot, and repair or replace as needed. What you do next can make all the difference in the final result, so take a closer look at the specific steps that’ll set your deck up for success.
Clear the Deck of Debris and Furniture
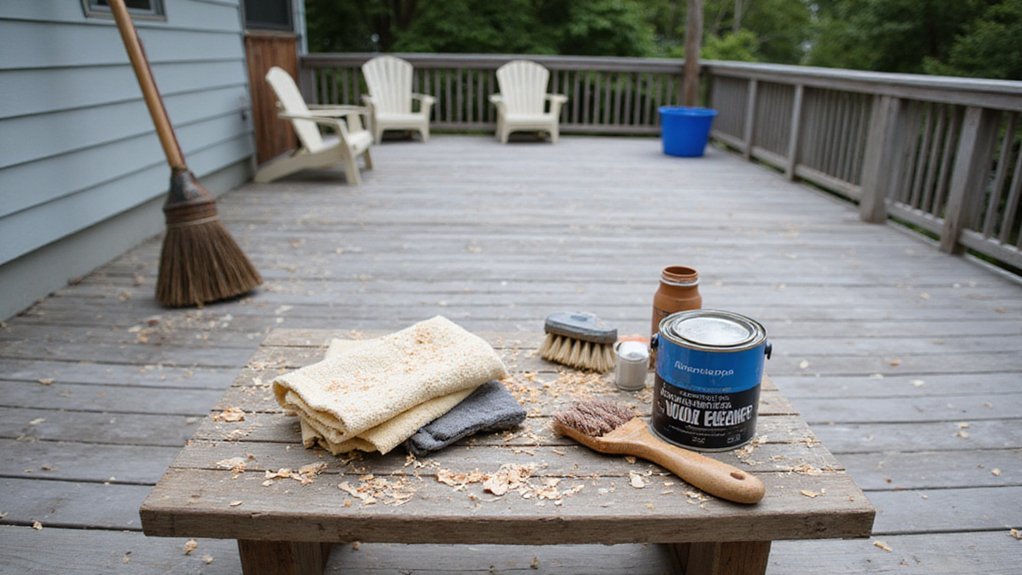
As you begin preparing your deck for painting or staining, start by clearing it of any debris and furniture. Remove planters, sweep away leaves, and take down any outdoor decorations or lighting. This will give you a clean slate to work with and prevent any obstacles from getting in the way of your prep work.
Take note of any areas with heavy buildup, such as corners or under railings, and give them extra attention. Use a broom or leaf blower to remove loose debris, and then use a pressure washer to blast away any stubborn dirt or grime. Be sure to use a wide fan tip and keep the nozzle at least 12 inches away from the deck surface to avoid damaging the wood. Remember that proper preparation is key to achieving a long-lasting finish, as deck maintenance is crucial for protecting against rot and moisture damage.
Inspect and Repair Damaged or Rotted Wood
With your deck cleared of debris and furniture, it’s time to inspect the surface for damaged or rotted wood. This step is essential, as painting or staining over damaged wood can lead to further deterioration and compromise the structural integrity of your deck.
As you inspect your deck, look for the following signs of damage:
- Soft spots: Press on the wood to check for softness, which can indicate rot or decay.
- Cracks and splits: Inspect for cracks and splits in the wood, especially in areas where boards meet.
- Discoloration: Check for discoloration, warping, or fungal growth, which can be signs of rot or insect damage.
- Insect damage: Inspect pressure treated wood for signs of insect damage, such as termite tunnels or carpenter ant nests.
Repair or replace any damaged or rotted wood to uphold a solid surface for painting or staining. For comprehensive exterior projects like painting or staining decks, consider professional services that handle high-quality finishes to enhance and protect your outdoor spaces.
Remove Old Finishes and Sealants
You’ve guaranteed your deck’s surface is solid by inspecting and mending damaged or decayed wood. Now, it’s time to remove old finishes and sealants that may be hiding imperfections or preventing new coatings from adhering properly.
Start by scraping off any loose or peeling finishes with a putty knife or a deck scraper. Be gentle to avoid gouging the wood. For tougher finishes, use a chemical stripper specifically designed for decks. Follow the manufacturer’s instructions and take necessary safety precautions.
Once you’ve removed the built-up varnish, dispose of old sealants and any remaining debris. Use a wire brush to remove any residue or dust. This step is indispensable in ensuring a strong bond between the wood and your new finish. By doing so, you’ll create a solid foundation for your new paint or stain job.
Clean the Deck Thoroughly
After removing old finishes and sealants, it’s essential that the deck surface is free from dirt, grime, and other contaminants that can interfere with paint or stain adhesion. You’ll need to thoroughly clean the deck to guarantee a strong bond between the wood and your chosen finish.
To do this, follow these steps:
- Pressure wash the deck to remove dirt and debris. Keep the nozzle at least 12 inches away from the wood to avoid damaging it.
- Use a hand scrub or stiff-bristled brush to scrub the deck, working in small sections. This will help loosen any remaining dirt and grime.
- Use a cleaning solution specifically designed for decks, and follow the manufacturer’s instructions.
- Rinse the deck thoroughly with clean water to remove any soap residue.
Brighten the Wood to Even Out the Tone
Frequently, decks that have been cleaned still exhibit uneven tone and discoloration, which can negatively impact the final appearance of your paint or stain job. To address this, you’ll need to brighten the wood to even out the tone.
Start by testing a wood cleaner on a small, inconspicuous area to guarantee it won’t damage your deck. Once you’ve found a suitable product, apply it according to the manufacturer’s instructions. This will help increase wood brightness and reduce discoloration. Be sure to rinse the deck thoroughly to remove any residue.
If some areas still appear darker than others, consider using a wood brightener specifically designed to eliminate tannins and other substances that can cause discoloration. By brightening the wood, you’ll create a more even canvas for your paint or stain, resulting in a more professional-looking finish.
Sand the Deck to Create a Smooth Surface
How rough is your deck’s surface? If it’s rough, uneven, or has splinters, it’s time to sand it down. Sanding creates a smooth surface for painting or staining, ensuring a professional-looking finish.
To get started:
- Use an orbital sander with 80-grit sandpaper to remove any rough spots or splinters.
- Sand in the direction of the wood grain to avoid scratching the surface.
- Avoid aggressive sanding, as it can create scratches or swirl marks.
- Work in small sections, sanding each area thoroughly before moving on to the next.
Check for Moisture and Dry the Deck Completely
Can you confidently say your deck is completely dry? Before painting or staining, it’s paramount to test moisture levels to guarantee a successful finish. Use a moisture meter to detect any hidden dampness, paying attention to areas around boards, railings, and support beams.
If you find high moisture levels, don’t rush the process – wait until the deck is fully dry. To hasten the drying process, remove any debris, clean the deck, and provide adequate airflow. Monitor drying time, as it may take several days or even weeks, depending on weather conditions.
Frequently Asked Questions
Can I Use a Pressure Washer to Clean My Deck?
You can use a pressure washer to clean your deck, but be cautious: stick to low pressure settings to avoid wood discoloration and damage; aim the nozzle at least 12 inches away from the deck to prevent damage.
How Long Should I Wait Before Painting or Staining?
You’ll want to wait until your deck’s moisture level drops below 15% to guarantee proper adhesion; typically, this takes 2-5 days, depending on weather conditions, before painting or staining to achieve a durable, long-lasting finish.
Can I Paint or Stain Over Old Finishes?
When applying multiple finishes, you’ll want to guarantee a strong bond between layers to avoid uneven coverage. Unfortunately, you can’t simply paint or stain over old finishes; instead, you’ll need to properly strip and prepare the surface to achieve a smooth, even result.
Do I Need to Remove All Old Sealant or Just Loose Bits?
You’ll need to remove loose bits of old sealant, but not necessarily all of it; instead, sand lightly to smooth the surface, and remove debris to guarantee a powerful bond between the old finish and new paint or stain.
Will Cleaning the Deck With Bleach Harm the Wood?
When cleaning your deck, avoid using bleach, as it can damage wood by breaking down lignin, causing it to become brittle and weak; instead, opt for a wood-friendly cleaner to guarantee a safe and effective cleaning process.